ForgeSprite

AI pixel art generator

Describe pixel-style props, icons, or static characters for your game. Add a reference if you have one.

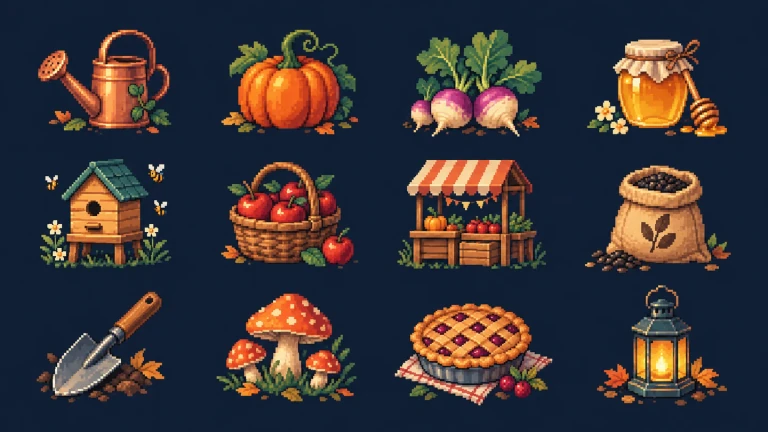
Eight pixel-style farming objects on a navy background.
Pixel Harvest — AI-generated example artwork showing a visual direction, not a Studio output.
Try a farming-game brief

Create six separate pixel-style inventory items for a farming game: a watering can, pumpkin, turnip, honey jar, seed sack, and lantern. Use a three-quarter view, warm autumn colors, dark outlines, and light from the upper left. Keep each object centered with empty space around it. Aim for readable silhouettes in 64 × 64 inventory slots. Show one sample before creating the remaining items.

The slot size is a design target, not a promised native output resolution. Replace the objects, viewpoint, and colors with those of your game.

From a brief to a reviewed set

  1. Define the shared rules

    List the objects, viewpoint, and colors. Add a reference to guide the look.

  2. Review one sample

    Review the plan and quoted credits, then inspect one sample before continuing the set.

  3. Check every output

    Review each PNG’s size, transparency, and readability in your game.

Check pixel art at its intended size

Write a focused pixel brief

Define one subject, viewpoint and palette. Use a reference to communicate the look you want.

Read details

Start with the job the art needs to do: an inventory icon, a static character concept, or a prop in a top-down scene. Name the objects and ask for separate assets if each needs its own file. Then describe a shared viewpoint, palette, outline weight and light direction. These constraints give you specific things to compare when the sample arrives. A long list of style adjectives is less useful than a clear description of the game screen where the artwork will appear.

For example, keep the farming-game brief above small: six inventory objects, warm colors and a three-quarter view. Attach a reference when you already have a visual direction, and say which details should carry over. Review the plan and credit quote in Studio before generation. For a set, approve the sample only after checking it beside an existing asset; change the brief or revise the sample if their scale or outlines disagree.

Inspect the actual dimensions

A 32 × 32 prompt is a design target. Read the PNG dimensions and review it at game scale.

Read details

Place the item in its intended inventory slot. Check whether the object reads at that size and whether neighboring items have a comparable visual scale. A detailed preview can become unreadable when reduced.

Treat a requested 32 × 32 or 64 × 64 slot as an intended use, not a guarantee about the model's native output. Read the downloaded file's dimensions and test a copy at the real display size. A small icon needs a distinct silhouette before it needs tiny decoration. If shrinking the image makes objects merge together, simplify the design or clean it up in a pixel editor before building the rest of the set.

Check edges and colors

Look for uneven pixel clusters, stray colors and blurred outlines before resizing or recoloring.

Read details

Inspect at native size and enlarged without smoothing. Look for uneven pixel clusters, stray colors, soft edges, and outline changes. Resizing alone does not repair those problems.

A pixel-art look is not the same as a hand-controlled pixel grid. Compare diagonal edges, outline thickness and repeated colors across the set. Exact recoloring can replace a known source color with a chosen replacement; it does not automatically reduce every shade to a strict palette. Keep an original PNG so that manual cleanup and later edits can be compared against the starting image.

Verify transparency

Check the alpha channel on more than one background. A painted checkerboard is not transparency.

Read details

Check the file over both light and dark backgrounds. Look for opaque corners, halos, clipped highlights, and uneven margins. A painted checkerboard is not an alpha channel.

Leave enough room around the silhouette for outlines and highlights. Check that the background is actually transparent, rather than a checkerboard painted into the image. If the output has a background or unwanted pixels, correct that asset before packing it with the others. A sheet maker preserves the pixels you give it; packing does not remove a background or improve the source artwork.

Prepare assets for the engine

Choose scale and filtering in your engine. Pack finished PNGs or resize with nearest-neighbor scaling.

Read details

Review texture filtering, sprite scale, pivots, and atlas regions in your engine. Import one file before processing the full set. An exported atlas still needs settings that match your project.

Once the PNGs look right, use the sprite sheet maker to arrange existing files into a grid or tight atlas. Keep its companion JSON with the sheet so you can recover frame locations later. This metadata describes the layout; it is not a native game-engine project. For larger display sizes, the resizer applies integer enlargement without adding detail. Neither tool generates new motion frames, and you should still check the final files in the target engine.

Know the output limits

Review generated art manually. This workflow does not guarantee a strict pixel grid, animation or seamless tiles.

Read details

The focus is static 2D assets with a pixel-art look. Exact native pixel dimensions, strict palette limits, transparent backgrounds, and consistent style require checking in the actual output. Animation generation, new character directions, automatic tilesets, and rigging are outside the current scope. Manual cleanup may still be needed before production use.

Use this page when pixel-style game assets are the goal. If you need painted or illustrated static sprites instead, start with the main AI sprite generator and describe that direction. If you already have finished PNG frames, go directly to the local sheet tools. Choosing the workflow that matches your input avoids spending generation credits on a task that only needs file processing.

Pixel art questions

No. An AI pixel art generator can interpret size as a visual instruction while returning a larger image. Check the actual file dimensions. Scaling down is a separate processing step and does not establish native pixel accuracy.