Recolor sprites with exact color replacement
Use the Studio pixel tools to map known colors to new colors and save versions of selected assets.
1. Open a project with an asset
Open Studio and sign in. Open the project containing the PNG you want to change. In a new project, use Add reference to upload it, then open Assets after the upload is ready.
2. Select the files to recolor
In Assets, open Batch pixel tools, then select the files inside the tool panel. The operation uses each asset’s current version. A historical version open in the inspector does not change that selection.
3. Set an exact color mapping
Set Operation to Replace exact color. Enter Original color and New color. Use Add color mapping for another pair. Matching is exact: neighboring shades and antialiased pixels need their own mappings.
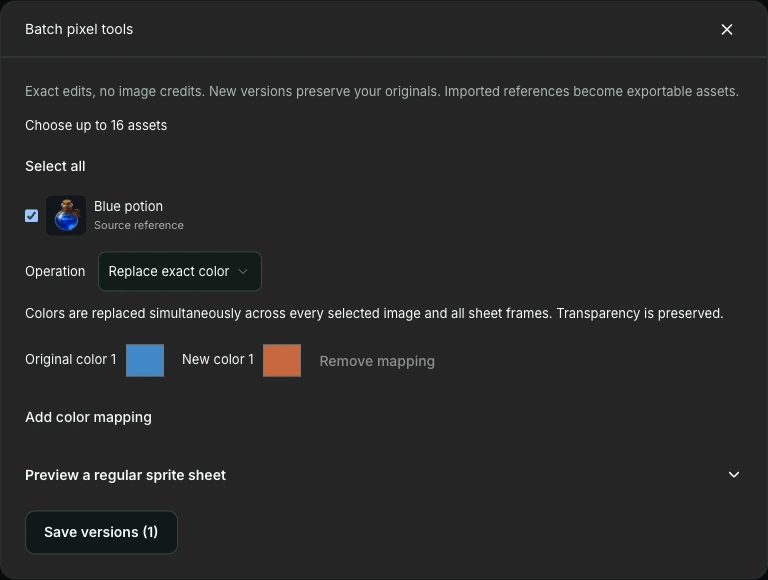
Prepared demonstration in Studio: select the file, choose Replace exact color, then set the color pair. This example mapping has not been applied to the pictured PNG. 4. Save and compare versions
Choose Save versions and wait for completion. Open the new PNG versions and compare the outline, highlights, and transparent areas with the originals. Download the version you want to keep.
Example mapping
For a sprite that contains #4088C8, map #4088C8 to #C86840. Inspect the image to choose the actual source colors; this example pair does not identify the palette of an uploaded file.
If you need to try again
If nothing changes, check that Original color exists in the selected PNG. Remove a mistaken mapping before trying again. A failed operation leaves the original versions available; successful operations save new versions.